Is your automatic trash can acting up? Maybe it’s not opening when you wave your hand or it’s closing too soon.
Don’t worry—you’re not alone. Sometimes these smart bins need a simple reset to work like new again. In this guide, you’ll discover easy steps to reset your automatic trash can quickly and get it back to perfect working order. Keep reading, and you’ll have your hands-free helper running smoothly in no time.
Common Reasons For Resetting
Resetting an automatic trash can is a simple fix for many common problems. The trash can may stop working correctly due to different reasons. Resetting helps restore its normal function quickly. Understanding these reasons can help you decide when to reset your device.
Sensor Malfunction
The sensor may stop detecting motion properly. Dust or dirt can cover the sensor lens. Sometimes, the sensor faces interference from strong light. This causes the lid to stay closed or open wrongly. Resetting the trash can often clears the sensor error. It helps the sensor work as it should again.
Power Issues
Power problems can cause the trash can to stop working. Low or dead batteries are the most common cause. Loose connections inside the battery compartment may also affect power. Resetting the trash can refreshes the power system. It can bring the device back to life without needing new parts.
Lid Not Responding
The lid may fail to open or close at times. Mechanical parts inside the trash can might get stuck. Sometimes, the control board needs a reset to work again. Resetting the trash can helps fix these lid issues. It resets the controls and frees stuck parts.

Credit: www.amazon.com
Tools Needed For Reset
Resetting an automatic trash can requires a few simple tools. Having the right tools helps make the process smooth and quick. This section lists the basic tools you need and important safety tips.
Basic Tools
You will need a small Phillips screwdriver to open the battery compartment. A soft cloth helps clean sensors and surfaces. Some models may need a new set of batteries. Keep a pair of gloves handy to avoid dirt and germs. A flashlight can help you see inside dark spaces.
Safety Precautions
Always unplug the trash can before starting the reset. Remove batteries to prevent electric shock. Work in a clean, dry area to avoid slips or damage. Handle tools carefully to avoid injury. Keep small parts away from children and pets.
Step-by-step Reset Process
Resetting your automatic trash can is simple with the right steps. Follow this clear process to get it working smoothly again. Each step targets a common issue to restore normal function quickly.
Power Cycle The Trash Can
Unplug the trash can or remove the batteries. Wait for 30 seconds to clear any temporary errors. Plug it back in or reinsert the batteries. This step refreshes the system and often fixes small glitches.
Clean The Sensor Area
Check the sensor for dirt or smudges. Use a soft, damp cloth to wipe the sensor gently. Avoid harsh cleaners that can damage the sensor. Clean sensors detect motion better and improve lid operation.
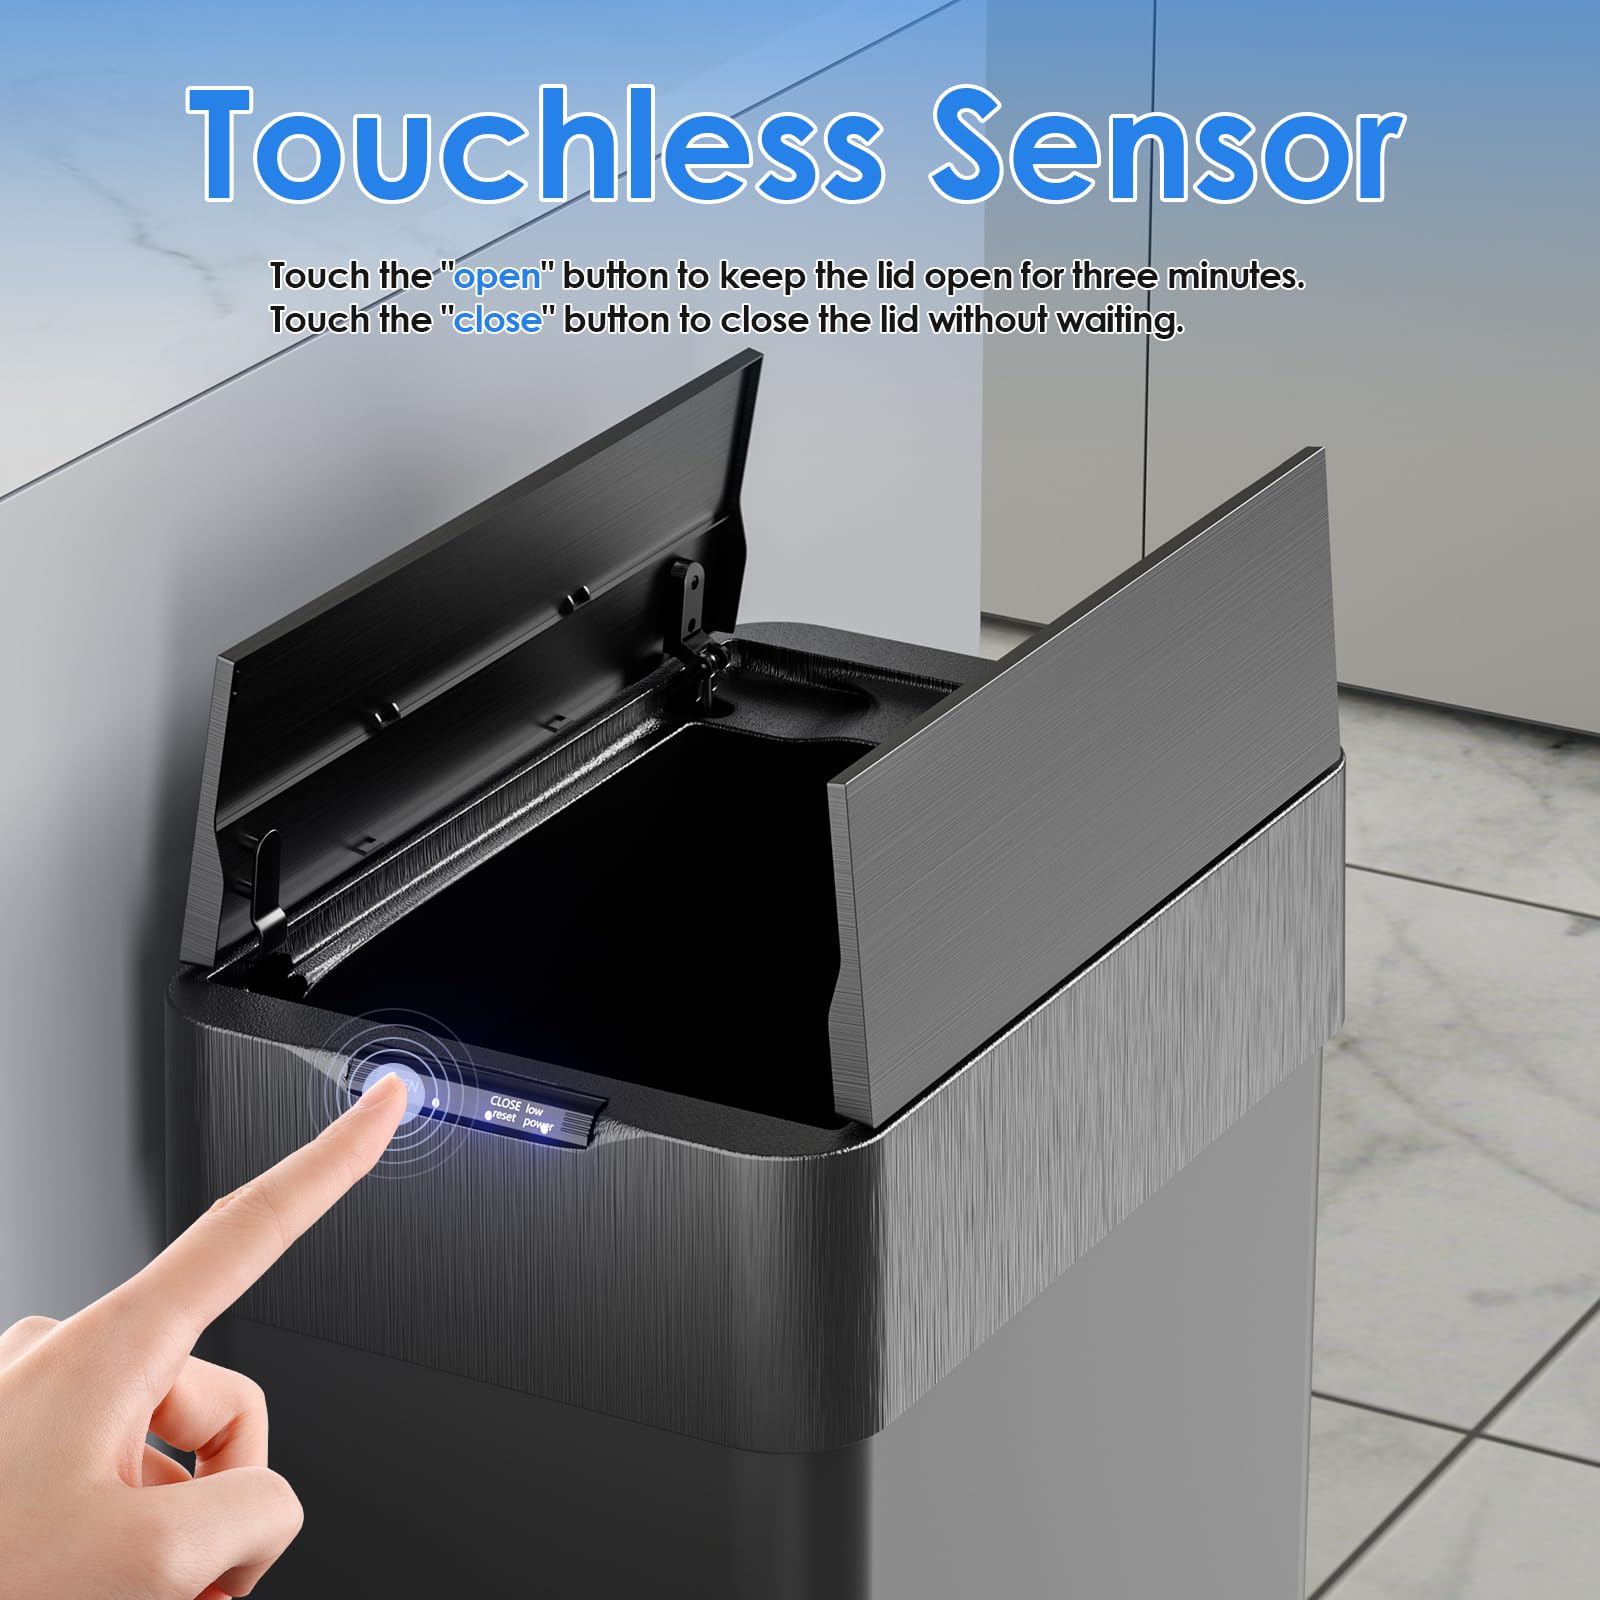
Manual Reset Button Use
Locate the manual reset button on your trash can. Press and hold the button for 10 seconds. Release it and wait for the trash can to restart. This resets settings and clears error codes stored inside.
Recalibrate The Lid
Open the lid fully and close it slowly. Repeat this motion 2 to 3 times. Some models require a specific button press during calibration. Follow your user manual for exact instructions. Recalibration helps the lid open and close smoothly.
Credit: www.amazon.com
Testing After Reset
After resetting your automatic trash can, testing it ensures proper function. This step confirms the reset worked and the device operates smoothly. Checking sensor response and lid movement are key parts of this process. Both must work correctly for your trash can to serve you well.
Sensor Response Check
Stand in front of the trash can. Move your hand slowly toward the sensor area. The sensor should detect your hand and trigger the lid to open. If the lid opens promptly, the sensor works fine. No reaction means the sensor may need adjustment or cleaning.
Lid Movement Verification
Observe the lid as it opens and closes. It should move smoothly without jerking or stopping. The lid must fully open and close every time. Any hesitation or noise signals a mechanical problem. Test the lid several times to confirm consistent operation.
Tips To Prevent Future Issues
Preventing problems with your automatic trash can saves time and effort. Small steps keep it working smoothly. Follow these simple tips to avoid future issues and extend the life of your device.
Regular Cleaning
Clean the sensor and lid often. Dust and dirt can block sensors and stop the lid from opening. Use a soft cloth and mild soap. Avoid water inside the battery compartment. Wipe dry after cleaning to prevent damage.
Battery Maintenance
Check batteries regularly. Replace weak or dead batteries quickly. Use the right battery type recommended by the manufacturer. Remove batteries if you won’t use the trash can for a long time. This stops corrosion and power loss.
Proper Placement
Place the trash can on a flat, stable surface. Avoid areas with direct sunlight or strong lights. Bright light can confuse the sensor. Keep it away from water sources and heat. Proper placement helps the sensor work correctly and lasts longer.
When To Contact Support
Sometimes resetting your automatic trash can does not solve the problem. Knowing when to contact support saves time and avoids frustration. Support teams can help with issues beyond basic troubleshooting.
Persistent Problems
If your trash can keeps having the same issue, contact support. Problems like sensor failure or motor issues need expert help. Repeated resets mean a deeper problem might exist. Support can guide you through advanced fixes or repairs.
Warranty Considerations
Check your warranty before trying complex repairs. Support can verify if your trash can is still under warranty. They may offer free repair or replacement. Contacting support early can protect your warranty rights and prevent extra costs.

Credit: www.itouchless.com
Conclusion
Resetting your automatic trash can keeps it working smoothly. Follow the steps carefully for best results. Regular resets help fix sensor or lid problems fast. Don’t ignore small issues; they can grow bigger. A well-maintained trash can saves time and effort daily.
Keep the device clean and check batteries often. Simple care prevents many common problems. Try these tips to enjoy a hassle-free trash experience. Your effort makes a big difference in how it works. Easy to do, worth the few minutes spent.