Are you tired of dealing with overflowing trash bins and constant trips to the dumpster? Installing a trash compactor could be the perfect solution to keep your kitchen cleaner and save space.
But how do you get started? Don’t worry—this guide will walk you through every step to install your trash compactor quickly and easily. By the end, you’ll enjoy a tidier home and less hassle with waste. Ready to transform your kitchen?
Let’s dive in!
Credit: mnplumbingandhomeservices.com
Tools And Materials Needed
Installing a trash compactor requires specific tools and materials. Having everything ready makes the process smoother. It saves time and avoids interruptions. Prepare all items before starting the installation.
Basic Hand Tools
A screwdriver set is essential for removing and securing screws. A wrench or adjustable spanner helps tighten bolts. A tape measure ensures proper alignment and space measurement. Pliers assist with gripping and bending wires or parts. A level guarantees the compactor sits flat and balanced.
Electrical Tools
A voltage tester checks if the power is off before working. Wire strippers prepare electrical wires for connection. Electrical tape secures wire connections safely. A drill with bits helps mount screws or anchors. Safety gloves protect hands during electrical work.
Materials For Installation
Use mounting brackets or screws provided by the manufacturer. Electrical wires should match the compactor’s power requirements. A power outlet near the installation area is necessary. Sealant or caulk helps prevent dust and moisture entry. Instruction manuals guide each installation step clearly.
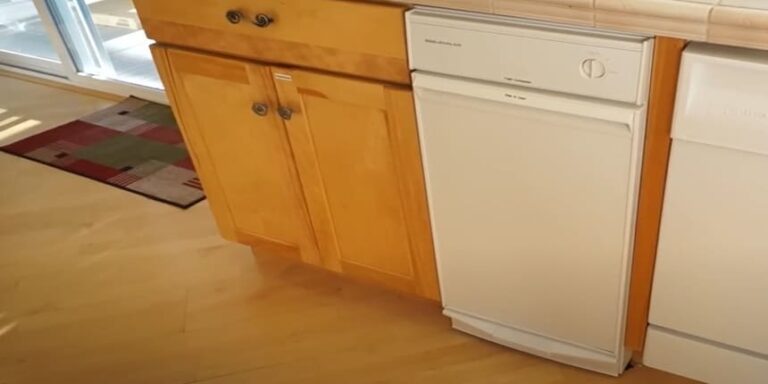
Choosing The Right Location
Choosing the right location for your trash compactor is very important. It affects how well the machine works and how easy it is to use every day. Picking a good spot can keep your kitchen clean and organized. This helps avoid bad smells and clutter.
Think about space, power, and convenience. These factors make sure your compactor fits well and works safely. Planning the location ahead saves time and effort later.
Space RequirementsMeasure the available space before buying a compactor. Check the height, width, and depth of the area. Leave enough room for the door to open fully. Also, allow space for ventilation around the machine. Tight spots can cause overheating and damage.
Access to Power OutletPlace the compactor near a power outlet. The machine needs electricity to work. Avoid using extension cords. They can be unsafe and cause power loss. Make sure the outlet matches the compactor’s plug type and voltage.
Convenience and AccessibilityChoose a spot that is easy to reach. Near the kitchen trash bin or sink works well. This saves steps when throwing away waste. Also, avoid placing the compactor too close to heat sources like ovens.
Preparing The Installation Area
Preparing the installation area is a key step before placing your trash compactor. This ensures the machine fits well and works safely. Taking time now avoids problems later.
Clear the space where the compactor will go. Remove old trash bins or any obstacles. Check the floor for damage or uneven spots.
Measure The Space Accurately
Use a tape measure to check the width, height, and depth. Compare these numbers to the compactor’s size. Leave extra room for air flow and easy access.
Check Electrical Requirements
Trash compactors need a power source nearby. Confirm there is a grounded outlet within reach. Make sure the electrical circuit can handle the compactor’s power needs.
Prepare The Flooring
The floor must be flat and strong enough to hold the compactor. Repair any cracks or holes. Consider placing a mat to protect the floor from scratches.
Clear Surrounding Cabinets And Walls
Remove items from nearby cabinets and walls. This prevents damage during installation. Allow space to open the compactor door fully without obstruction.
Unpacking The Trash Compactor
Unpacking the trash compactor is the first step in the installation process. Handle the unit with care to avoid damage. Clear space near the installation area before opening the box.
Follow the instructions on the packaging to open it safely. Remove any protective materials like foam or plastic wrap. Check the compactor for visible damage or dents.
Check The Contents
Make sure all parts are included in the box. Look for the main compactor unit, power cord, and user manual. Confirm that mounting brackets and screws are also inside.
Inspect For Damage
Examine the compactor closely for scratches or dents. Report any damage to the seller immediately. Do not install a damaged unit, as it may cause problems later.
Read The User Manual
Go through the manual carefully before starting installation. It contains important safety tips and step-by-step instructions. Keep the manual handy for reference during setup.
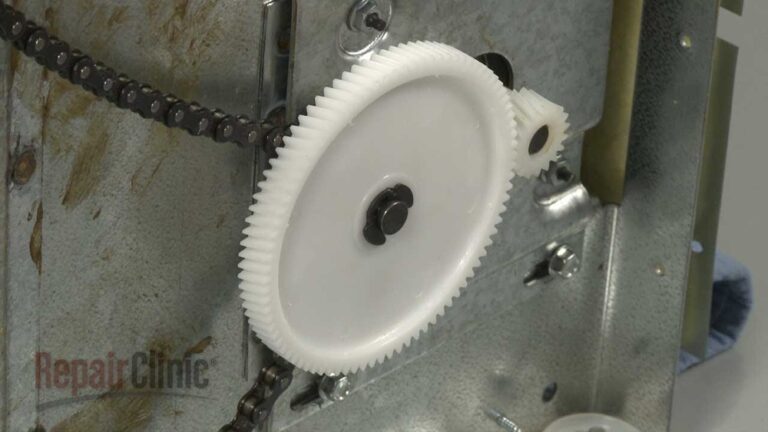
Connecting Electrical Components
Connecting the electrical parts of a trash compactor is a key step. It powers the machine and makes it work safely. Proper connections avoid short circuits and other hazards. Follow instructions carefully for a secure setup.
Preparing The Power Supply
Turn off the main power before starting any work. Locate the power source near the installation spot. Use a voltage tester to confirm no electricity flows. A dedicated circuit with the right amperage is best for safety.
Wiring The Trash Compactor
Match the wires from the compactor to the house wiring. Connect black to black (live wire), white to white (neutral), and green or copper to ground. Use wire nuts to secure the connections. Wrap them with electrical tape for extra protection.
Installing The Switch And Controls
Attach the switch according to the manual’s diagram. The switch controls power flow to the compactor. Mount it where it is easy to reach. Test the switch before finalizing the installation.
Testing The Electrical Setup
Turn on the main power after all connections are complete. Check the compactor for proper operation. Listen for unusual sounds or smells. Stop immediately if something seems wrong. Safety first.

Credit: www.youtube.com
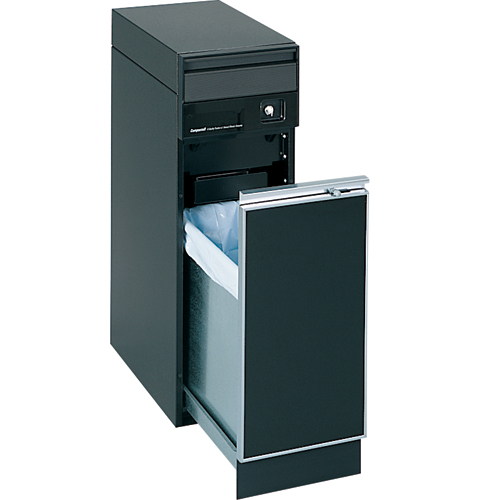
Securing The Trash Compactor
Securing the trash compactor correctly is essential for safe use and long-lasting performance. A firmly installed compactor prevents movement and damage during operation. It also keeps the appliance stable, reducing noise and vibration. Follow these clear steps to secure your trash compactor properly.
Position The Trash Compactor
Place the compactor in its designated spot. Make sure it fits well without gaps around the sides. The floor should be flat and solid. Avoid placing it on uneven or soft surfaces.
Attach Mounting Brackets
Locate the mounting brackets included with your compactor. Use screws to fix the brackets to the wall or cabinet. Tighten the screws firmly to hold the compactor in place. Check that the brackets are level and secure.
Use Anti-tip Devices
Install anti-tip brackets or straps if provided. These devices stop the compactor from tipping forward. Follow the manufacturer’s instructions for correct placement. Double-check all fasteners for tightness.
Check For Stability
Push and pull the compactor gently to test stability. It should not move or wobble. If it does, tighten the brackets or adjust the position. A stable compactor works safely and quietly.
Testing The Unit
Testing the trash compactor is a key step after installation. It ensures the unit works correctly and safely. This process helps avoid future problems and confirms everything is set up properly.
Turn On The Power
First, switch on the power to the trash compactor. Check the power source and circuit breaker. Make sure the unit receives electricity without any issues. This step prevents electrical faults during use.
Run A Test Cycle
Start a test cycle to see if the compactor operates smoothly. Listen for unusual noises or vibrations. The unit should compact trash quietly and steadily. Stop the cycle if you notice any problems.
Check The Safety Features
Test all safety features before regular use. The door switch must stop the compactor when opened. The motor should stop if the unit overheats. These features protect users and prevent damage.
Inspect For Leaks And Blockages
Look inside and outside the unit for leaks or blockages. Trash should move easily without getting stuck. Clean any debris found during the inspection. Proper flow keeps the compactor running well.
Verify The Compaction Level
Check how well the trash is compacted after a cycle. The trash should be tightly packed to save space. If not, adjust settings or check the ram for issues. Efficient compaction improves waste management.
Maintenance Tips
Keeping your trash compactor in good shape helps it work longer and better. Regular care prevents bad smells and jams. Small actions can save you time and repair costs later.
Clean The Interior Regularly
Wipe the inside of the compactor every week. Use a mild soap and warm water. Avoid harsh chemicals that can damage parts. Dry the area well to stop rust and mold.
Check And Empty The Trash Bag Often
Change the trash bag before it gets too full. Overfilled bags can cause the compactor to jam. Use the right size and type of bag. This keeps the machine running smoothly.
Lubricate Moving Parts
Put oil on the compactor’s moving parts once a month. This stops squeaks and wear. Use light machine oil for best results. Be careful not to over-lubricate as this can attract dirt.
Inspect The Power Cord And Switch
Look at the power cord for cuts or damage. Check if the switch works properly. Damaged cords or switches are a safety risk. Replace any faulty parts immediately.
Run The Compactor Regularly
Use the compactor often to keep parts from sticking. Running it once a week is enough for most homes. This helps maintain the motor and other components.

Credit: www.youtube.com
Conclusion
Installing a trash compactor can save space and reduce waste. Follow each step carefully for a smooth setup. Always check the manual and use the right tools. Test the compactor to ensure it works well. Keep safety in mind throughout the process.
A properly installed compactor makes trash handling easier. Enjoy a cleaner, more organized kitchen with less trash. Take your time and don’t rush the job. Success comes with patience and attention to detail.