Are you tired of dealing with messy trash cans that take up too much space in your kitchen? Installing a pull out trash can can change the way you handle waste, making your space cleaner and more organized.
Imagine having your trash hidden away neatly inside a cabinet, easy to access but out of sight. You’ll discover simple steps to install a pull out trash can yourself, saving you time and money. Let’s make your kitchen more efficient and clutter-free—read on to find out how!
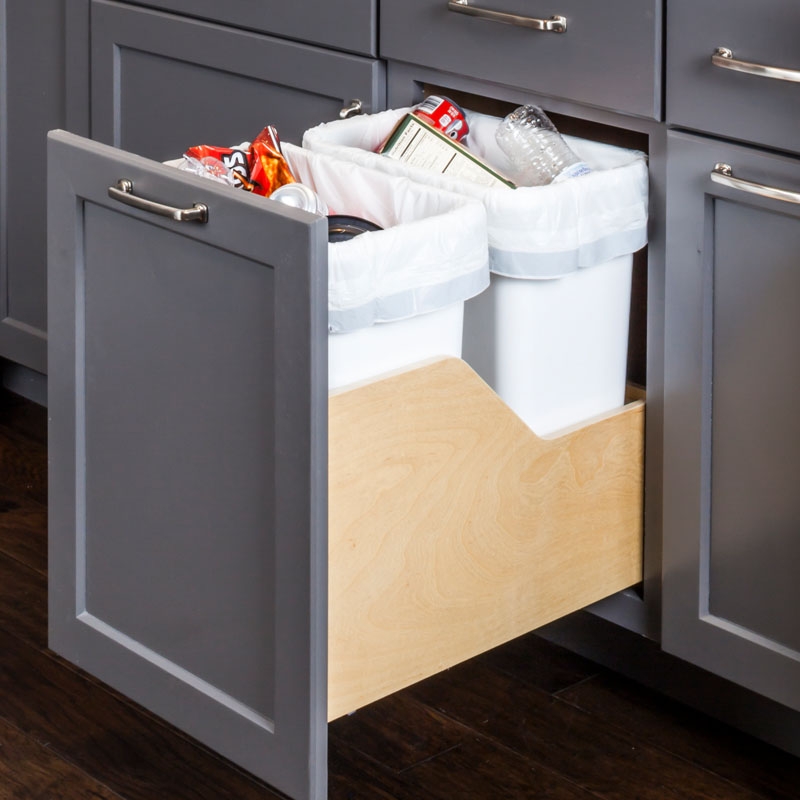
Choosing The Right Pull Out Trash Can
Choosing the right pull out trash can makes a big difference in your kitchen’s look and function. It keeps trash out of sight and helps keep your space clean. Picking one that fits your needs and cabinet size is key. Think about how much trash you create daily and the space available. This helps find the perfect match for your home.
Size And Capacity Options
Trash cans come in many sizes. Small ones fit tight spaces. Large ones hold more waste. Choose a size based on your kitchen habits. A bigger family may need a larger bin. Single users might prefer a smaller, compact model. Measure your cabinet space before buying. This avoids buying a bin that won’t fit.
Material And Durability
Pull out trash cans are made from plastic, metal, or a mix. Plastic bins are light and easy to clean. Metal bins last longer and resist stains. Choose a material that suits your lifestyle. Strong materials handle heavy use. Check for smooth edges and sturdy handles. These details help the bin last longer and work better.
Compatibility With Cabinets
Not all pull out trash cans fit every cabinet. Some need special slides or mounts. Check your cabinet size and door style. Some bins work better with soft-close doors. Others need more space to slide out fully. Make sure the bin matches your cabinet design. This ensures easy use and a neat look.

Credit: housefulofhandmade.com
Tools And Materials Needed
Installing a pull out trash can needs the right tools and materials. This helps the job go smoothly and gives a neat finish. Having everything ready saves time and avoids mistakes. The list includes basic tools, extra supplies, and safety gear. Each part plays a key role in the installation process.
Basic Tools List
- Screwdriver (Phillips and flathead)
- Measuring tape
- Drill with drill bits
- Level
- Pencil or marker
- Adjustable wrench
- Hammer
Additional Supplies
- Pull out trash can kit
- Screws and mounting brackets (usually included)
- Wood glue (optional for extra strength)
- Sandpaper (for smoothing edges)
- Cleaning cloth
Safety Precautions
- Wear safety goggles to protect your eyes
- Use gloves to avoid splinters and cuts
- Keep tools away from children
- Work in a well-lit area
- Check for electrical wires before drilling
Preparing Your Cabinet
Preparing your cabinet is the first step for a smooth pull out trash can installation. It ensures the space is ready and fits the new fixture perfectly. Careful preparation saves time and avoids problems later.
Emptying And Cleaning
Remove everything from inside the cabinet. Clear space helps you work easily. Clean the area well to remove dust and dirt. A clean cabinet ensures the pull out mechanism works smoothly.
Measuring And Marking
Measure the cabinet’s width, height, and depth carefully. Write down the numbers for reference. Mark spots where you will place screws and rails. Accurate measuring and marking prevent mistakes during installation.
Removing Obstacles
Check for any pipes, wires, or shelves inside the cabinet. Remove or adjust these obstacles if needed. Clear space allows the trash can to slide in and out freely. Safety is important, so be careful during this step.
Step-by-step Installation Guide
Installing a pull out trash can helps keep your kitchen tidy and organized. This guide breaks down the installation into clear, simple steps. Follow each part carefully to ensure a smooth setup. No special tools or skills needed.
Assembling The Frame
Start by laying out all frame parts on a flat surface. Connect the frame pieces using the screws provided. Tighten screws but avoid overtightening. Make sure the frame is square and stable before moving on.
Attaching Slides To Cabinet
Locate the spots inside your cabinet for slide installation. Use a level to mark straight lines. Attach the slides to the cabinet walls with screws. Check that slides move smoothly and align properly.
Mounting The Trash Can Holder
Place the assembled frame onto the slides. Secure the frame with screws through the slide brackets. Confirm the frame fits snugly inside the cabinet. Adjust if needed to prevent wobbling or gaps.
Testing The Pull Out Mechanism
Pull the frame out slowly to test the slides. Ensure the trash can holder moves smoothly without sticking. Push it back fully to check alignment. Make final adjustments for easy, quiet operation.
Customizing For Convenience
Customizing your pull out trash can makes daily tasks easier and tidier. Tailoring the setup to your needs saves time and keeps the kitchen neat. Small changes can bring big convenience. Let’s explore some simple ways to upgrade your pull out trash can.
Adding Trash Bag Holders
Trash bag holders keep bags in place and prevent slipping. They make changing bags quick and clean. You avoid messes caused by loose bags falling inside. These holders fit inside the pull out can and hold the bag tight. This small addition keeps your trash area organized and neat.
Installing Odor Control Features
Odor control helps keep your kitchen smelling fresh. You can add charcoal filters or baking soda holders inside the trash compartment. These absorb bad smells before they spread. Some pull out cans come with built-in vents for air flow. Keeping odors in check improves your kitchen’s comfort.
Incorporating Recycling Bins
Separate bins for recycling make sorting trash easy. You can install smaller bins next to the main trash can. This setup encourages recycling right at the source. It reduces clutter and helps the environment. Having dedicated spaces for recyclables keeps your kitchen cleaner and greener.
Credit: www.conestogawood.com
Maintenance Tips
Keeping your pull out trash can in good shape is important. It helps the unit work smoothly and last longer. Simple maintenance steps can prevent problems. Spend a few minutes regularly to keep it clean and functional.
Cleaning The Pull Out Trash Can
Remove the trash bin from the slide. Wash it with warm water and mild soap. Use a soft cloth or sponge to scrub inside and outside. Rinse well and dry completely before placing it back. Clean the area around the slide too. This stops dirt buildup and bad smells.
Lubricating Slides
Check the metal or plastic slides for smooth movement. Apply a small amount of silicone spray or lubricant. Avoid oil-based lubricants; they attract dust and grime. Move the slides back and forth to spread the lubricant evenly. Lubrication prevents squeaks and keeps the drawer sliding easily.
Troubleshooting Common Issues
If the drawer sticks or doesn’t close fully, check for obstructions. Dirt, trash bags, or debris can block the tracks. Tighten any loose screws on the slide or frame. Bent or damaged slides may need replacement. Regular checks help spot problems early and keep your trash can working well.
Benefits Of A Pull Out Trash Can
Pull out trash cans offer many benefits for kitchens. They save space and keep the kitchen tidy. These cans fit inside cabinets and slide out when needed. This design helps keep trash out of sight and reduces clutter. It makes kitchen work easier and more pleasant.
Maximizing Kitchen Space
Pull out trash cans free up floor space. They fit inside cabinets and do not take extra room. This makes small kitchens feel larger. You can use the saved space for other kitchen tools. It helps keep countertops clear and organized.
Improving Hygiene
Trash stays hidden in a pull out can. This keeps smells and germs away from food areas. The sliding feature lets you close the trash quickly. It reduces the chance of spills and messes. Cleaning is easier because the trash is contained.
Enhancing Kitchen Aesthetics
Pull out trash cans keep the kitchen looking neat. No open trash bins to spoil the view. Cabinets hide the trash and keep the kitchen stylish. This design fits well with modern and classic kitchens. It creates a clean and inviting space for cooking.
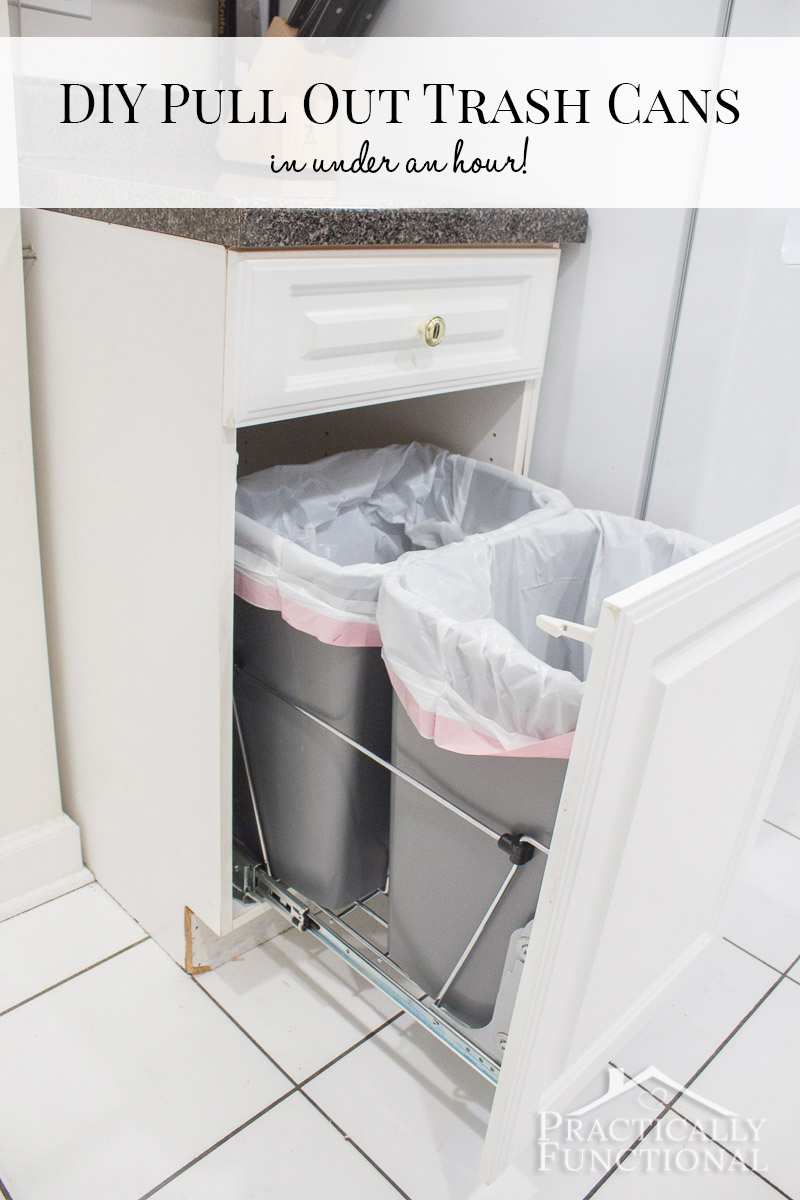
Credit: www.practicallyfunctional.com
Conclusion
Pull out trash cans keep your kitchen clean and neat. They save space and make trash easy to handle. Installing them is simple and quick with the right tools. You get a tidy look and less mess on the floor.
Choose the size that fits your cabinet well. Enjoy a more organized kitchen every day. A small change brings big convenience. Try it and see the difference yourself.